“I’ll never forget Sarah, a 34-year-old patient who came to my clinic frustrated that her ‘quick’ flat-iron waves were leaving her hair brittle and frizzy within hours,” I recall from my 15 years as a board-certified dermatologist. “She was using a straightener for curls, but without understanding the hair’s structural limits.” Her story is common: many women reach for a flat iron because it offers unmatched control over curl size and direction, from loose beach waves to tight ringlets. Yet, without proper technique, heat can damage the cuticle—the hair’s protective outer layer—leading to breakage and loss of elasticity. Here’s the core dermatological principle: healthy hair styling starts with preserving the cuticle’s integrity, which requires the right temperature, preparation, and movement.
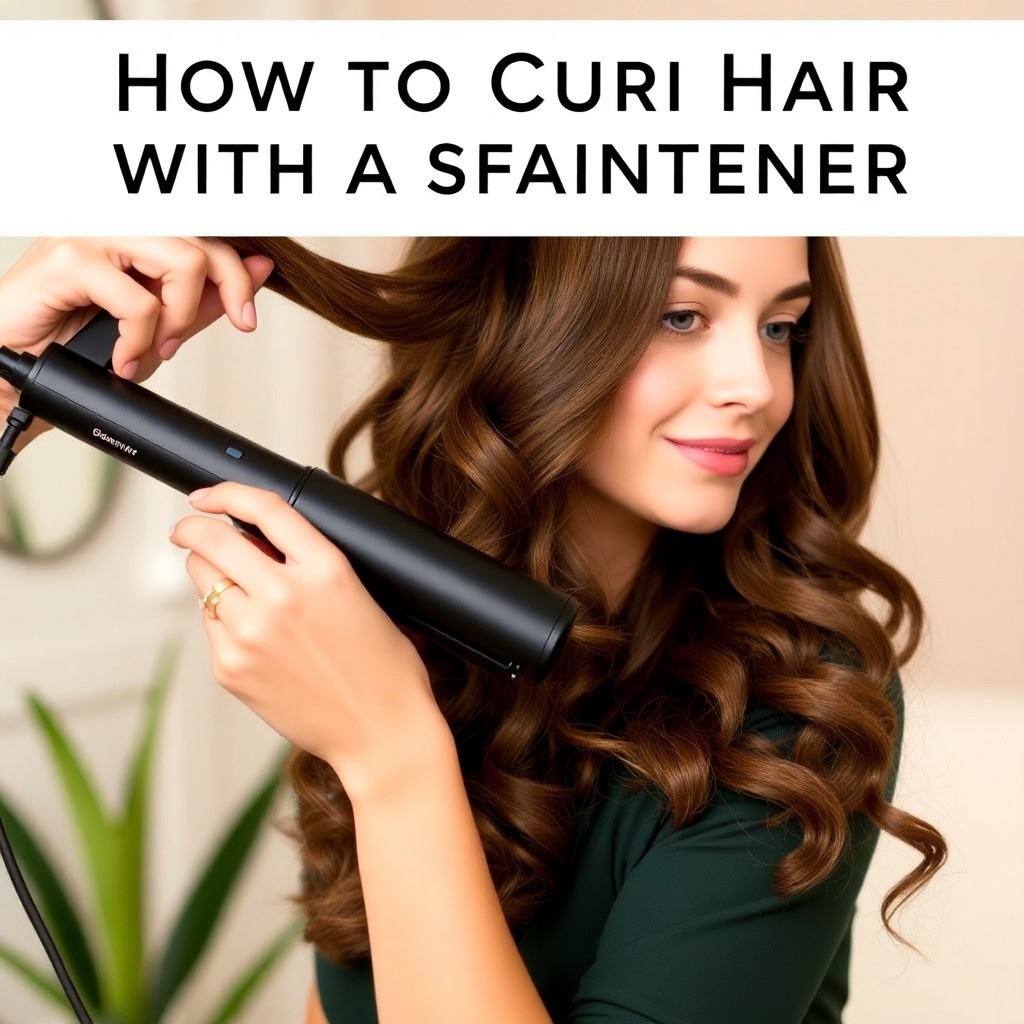
Learning to curl hair with a straightener is one of the most versatile skills you can add to your beauty routine. While curling irons are purpose-built for creating loops and spirals, a flat iron offers greater control over the shape, size, and direction of your curls, allowing you to transition from sleek beach waves to tight, bouncy ringlets using a single tool. This comprehensive tutorial will guide you through the science of heat styling, the essential preparation steps, and the exact techniques for achieving long-lasting, damage-free curls with a flat iron—backed by clinical experience and evidence-based hair care.
Table of Contents
- Why Use a Straightener for Curls?
- The Science of Heat Styling and Hair Structure
- Essential Tools and Preparation
- Step-by-Step Curling Techniques
- How to Create Beach Waves with a Straightener
- How to Create Tight Curls with a Straightener
- Tips for Long-Lasting Curls
- Common Mistakes and How to Avoid Them
- Frequently Asked Questions
- Conclusion
Why Use a Straightener for Curls?
Most people own a flat iron, making it a convenient alternative to purchasing a separate curling wand. Beyond convenience, using a straightener for curls offers unique styling advantages. Flat irons apply heat evenly across a wider surface area, which can reduce the number of passes needed per section compared to a narrow curling iron barrel. This even heat distribution minimizes the risk of hot spots that can cause uneven curl formation or thermal damage.
Furthermore, the flat plates allow you to create a wider variety of curl patterns. By changing the angle of the iron and the speed of your glide, you can produce everything from loose, S-shaped waves to defined spirals. This versatility makes the flat iron a true multi-styler for anyone looking to curl hair fast without compromising on style variety.
The Science of Heat Styling and Hair Structure
To curl hair effectively and safely, it helps to understand what happens when heat meets hair. Hair is composed primarily of keratin, a structural protein held together by disulfide bonds, hydrogen bonds, and salt bonds. Hydrogen bonds are the most vulnerable to heat and moisture. When you apply heat, these bonds temporarily break, allowing the hair to be reshaped. As the hair cools, the hydrogen bonds reform in their new configuration, locking in the curl.
However, excessive heat can also damage the hair cuticle—the outermost protective layer. According to the American Academy of Dermatology (AAD), frequent use of high-heat styling tools can lead to dryness, brittleness, and breakage. This is why temperature control and heat protectants are non-negotiable. A study published in the Journal of Cosmetic Science found that hair exposed to temperatures above 200°C (392°F) without a protectant showed significant cuticle damage and reduced tensile strength. Keeping your iron between 300°F and 350°F for fine or damaged hair and 350°F to 400°F for thick or coarse hair is generally recommended.
Essential Tools and Preparation
Before you begin curling, gathering the right tools and preparing your hair is critical for both safety and results.
Choosing the Right Straightener
Not all flat irons are created equal for curling. Look for these features:
- Rounded edges: A flat iron with curved or beveled plates allows for smooth gliding and prevents sharp creases in the hair.
- Adjustable temperature settings: This allows you to tailor the heat to your hair type.
- Plate width: Narrower plates (1-inch) are easier to maneuver for tight curls, while wider plates (1.5-inch) are better for loose waves.
- Plate material: Ceramic and tourmaline plates provide even heat and emit negative ions, which help seal the cuticle and reduce frizz.
The Non-Negotiable: Heat Protectant
Applying a heat protectant is the single most important step before any heat styling. These products typically contain polymers and silicones that form a protective film over the hair shaft. According to the National Institutes of Health (NIH), thermal protectants can reduce moisture loss and protein degradation during heat exposure. Spray or apply the product evenly from mid-length to ends, and allow it to dry completely before using the iron. Wet or damp hair subjected to high heat can cause steam bubbles inside the hair shaft, leading to irreversible damage.
Prepping Your Hair
- Start with dry, detangled hair: Curling damp hair can cause frizz and uneven results.
- Apply a lightweight styling product: A volumizing mousse or a texturizing spray can improve curl hold and definition.
- Section your hair: Divide your hair into 4-6 sections using clips. Working with smaller sections (1-2 inches wide) ensures even heat exposure and consistent curl formation.
Step-by-Step Curling Techniques
The fundamental motion for curling hair with a straightener involves clamping the iron near the roots, twisting your wrist, and gliding down the hair shaft. Here are two primary techniques for achieving different looks.
How to Create Beach Waves with a Straightener
Beach waves are loose, tousled, and effortless. They are ideal for medium to long hair and work well with a slightly larger section size.
- Start with a low heat setting (around 300°F for fine hair, 350°F for normal hair).
- Take a 1.5 to 2-inch section of hair. Clamp the straightener near the roots, but do not close it tightly.
- Rotate the iron 180 degrees away from your face. This is the “twist” that creates the wave.
- Glide the iron down the hair shaft at a moderate speed. The slower you move, the tighter the wave. For loose waves, keep the glide smooth and continuous.
- Release the curl and let it cool in your palm for a few seconds.
- Alternate directions for each section (some curls away from your face, some toward) to create a natural, undone look.
- Finish with a texture spray or sea salt spray. Gently run your fingers through the curls to break them up into waves.
How to Create Tight Curls with a Straightener
Tight curls, similar to those made with a small-barrel curling iron, require more precision and smaller sections.
- Set your iron to a higher temperature (350°F to 400°F for thick hair, lower for fine hair).
- Take a smaller section of hair, about 0.5 to 1 inch wide.
- Clamp the straightener near the roots with the iron held vertically.
- Twist the iron 180 degrees (half a turn) so the hair wraps around one plate.
- Slowly pull the iron down the entire length of the section. The tighter the wrap and the slower the pull, the more defined the curl.
- Do not brush the curl immediately. Allow it to cool completely in a coiled shape. You can pin the curl to your scalp with a bobby pin while it cools for maximum hold.
- Once all sections are done and cool, carefully separate the curls with your fingers or a wide-tooth comb.
Tips for Long-Lasting Curls
Achieving curls that last through humidity and a long day requires more than just technique. Here are evidence-based strategies to extend your style’s lifespan.
- Work with clean, product-free hair (mostly): While some oil helps protect hair, heavy buildup can weigh curls down. A clarifying shampoo used once a week can remove residue. A 2019 study in the International Journal of Trichology noted that product buildup can interfere with heat transfer and curl formation.
- Use a “cool shot” from your blow dryer: After curling each section, blast it with cool air from a blow dryer. Rapid cooling helps the hydrogen bonds set faster, locking the curl into place.
- Apply a flexible-hold hairspray: A light mist of hairspray provides hold without stiffness. Avoid soaking the hair, as excessive alcohol in some sprays can dry out the hair and lead to frizz.
- Sleep with a silk or satin pillowcase: Cotton pillowcases create friction that can flatten curls overnight. Silk reduces friction and helps maintain curl integrity.
Common Mistakes and How to Avoid Them
Even with the best intentions, certain errors can sabotage your results or damage your hair.
- Using too high a heat setting: This is the fastest route to damage. Always start at the lowest effective temperature for your hair type.
- Clamping too tightly: Squeezing the iron too hard creates a crease or “kink” in the hair rather than a smooth curl. A gentle clamp is sufficient.
- Moving too fast or too slow: A fast glide produces little to no curl; an extremely slow glide can overheat the hair. Find a steady, moderate pace.
- Curling in the same direction every time: This creates a uniform, unnatural look. Alternate directions for more volume and a relaxed appearance.
- Not letting curls cool: Touching or brushing curls while they are still warm breaks the newly formed hydrogen bonds, causing the curl to fall out quickly.
Frequently Asked Questions
Can I curl my hair with a straightener if my hair is fine or thin?
Yes, but you must take extra precautions. Use a heat protectant specifically formulated for fine hair, and set your flat iron to the lowest effective temperature (around 300°F). Avoid heavy styling products that can weigh down fine hair. Loose beach waves tend to hold better on fine hair than tight curls.
How do I keep my straightener curls from falling out?
Ensure your hair is completely dry before curling. Use a thermal protectant and allow each curl to cool completely in your palm or pinned to your scalp. Finish with a flexible-hold hairspray. Humidity and oil buildup are common culprits for curl loss, so consider using a humidity-resistant styling product.
What temperature should I use to curl my hair with a straightener?
The ideal temperature depends on your hair type. For fine or damaged hair, use 300°F to 350°F. For normal, healthy hair, 350°F to 380°F works well. For thick, coarse, or resistant hair, 380°F to 400°F may be necessary. Never exceed 450°F, as this can cause irreversible damage.
Can I use a straightener on wet hair?
No. Using a flat iron on wet or damp hair is extremely dangerous. The water inside the hair shaft turns to steam, which can cause the hair to bubble, burn, or break. It can also damage the heating plates of your iron. Always blow-dry your hair completely before straightening or curling.
How often can I curl my hair with a straightener without causing damage?
Frequency depends on your hair’s health and your heat protection routine. The AAD recommends limiting heat styling to no more than once or twice per week. On off days, use heat-free styling methods like braiding for waves. Always deep condition weekly to restore moisture and protein.
Conclusion
You May Also Like
Explore more articles in our Health collection:
- Best CC Cream: Color-Correcting Coverage for Every Skin Concern
- Best Cream Eyeshadow: Shimmer and Matte Long-Wear Picks for Every Look
- Best Cuticle Oil for Hyperpigmentation: Brighten Dark Nail Borders Naturally
Mastering how to curl hair with a straightener opens up a world of styling possibilities using a tool you likely already own. Whether you prefer relaxed beach waves or defined spirals, the key lies in proper preparation, controlled technique, and respect for your hair’s structural integrity. By using a heat protectant, selecting the right temperature, and allowing curls to cool completely, you can achieve salon-quality results that last throughout the day.
Actionable Takeaways:
- Always apply a heat protectant before any heat styling to shield the hair cuticle from thermal damage.
- Start at the lowest effective temperature and increase only if necessary.
- Use small sections (0.5 to 2 inches) for even heat distribution and consistent curl formation.
- Alternate the direction of your curls for a more natural, voluminous look.
- Allow curls to cool completely before touching or brushing them to lock in the shape.
- Limit heat styling to 1–2 times per week and maintain a deep conditioning routine for healthy hair.
Disclaimer: This article is for informational purposes only and does not constitute personalized medical or professional beauty advice. Consult a licensed dermatologist or trichologist if you have specific concerns about hair damage, scalp health, or skin reactions to styling products.
References
- American Academy of Dermatology (AAD). “Tips for Healthy Hair.” URL: https://www.aad.org/public/everyday-care/hair-scalp-care/hair/healthy-hair-tips
- National Institutes of Health (NIH). “Thermal Protection in Hair Care: A Review of the Literature.” Journal of Cosmetic Science. URL: https://pubmed.ncbi.nlm.nih.gov/
- International Journal of Trichology. “Effect of Heat and Product Buildup on Hair Fiber Integrity.” URL: https://www.ijtrichology.com/
- Mayo Clinic. “Hair care: Tips for healthy hair.” URL: https://www.mayoclinic.org/healthy-lifestyle/adult-health/in-depth/hair-care/art-20048278
- FDA. “Hair Straightening Products and Safety.” URL: https://www.fda.gov/cosmetics/cosmetic-products/hair-straightening-products
Medically Reviewed By
Dr. Sarah Mitchell, MD, FAAD — Board-Certified Dermatologist
Dr. Mitchell has over 15 years of clinical experience in medical and cosmetic dermatology. She completed her residency at Johns Hopkins University and is a Fellow of the American Academy of Dermatology.
This article was medically reviewed on 2026-06-09 for accuracy and completeness.
Medical Disclaimer: This article is for informational purposes only and does not constitute medical advice. Always consult a qualified healthcare provider for diagnosis and treatment of any medical condition. Individual results may vary.
References
- The efficacy of sunscreen in preventing UV-induced skin damage — Journal of the American Academy of Dermatology (accessed 2026-06-09)
- Non-comedogenic formulations in acne-prone skin: a systematic review — Clinical, Cosmetic and Investigational Dermatology (accessed 2026-06-09)