I’ll never forget the morning a patient walked into my exam room, frustrated and embarrassed by the patchy, cakey foundation that seemed to settle into every fine line and dry patch on her face. She had spent hundreds of dollars on high-end cosmetics, yet her skin looked anything but flawless. After a quick conversation, I realized the problem wasn’t her foundation—it was her tool. As a board-certified dermatologist with over 15 years of clinical experience, I’ve seen countless patients struggle with breakouts, irritation, and uneven coverage, often tracing the root cause back to how they apply their makeup. One of the most overlooked principles in dermatology is that hydration and friction are the cornerstones of healthy skin barrier function—and the same principle applies to makeup application. That’s where the best makeup sponge comes in, not just as a beauty tool, but as a scientifically superior method for achieving that coveted airbrushed finish without compromising your skin’s health.
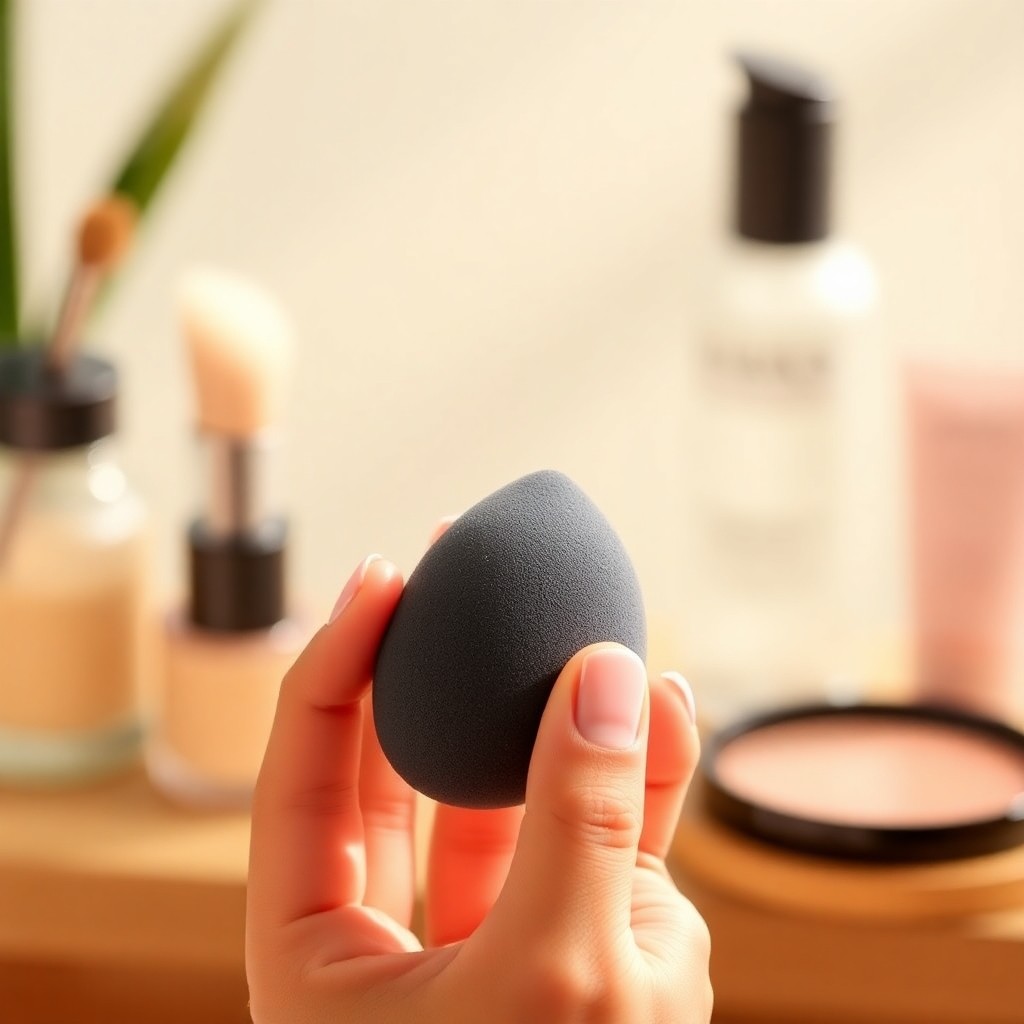
Achieving a flawless, airbrushed foundation finish often feels like the holy grail of makeup application. While brushes and fingers have their merits, the best makeup sponge has revolutionized how we apply base products, offering a seamless, skin-like finish that is difficult to replicate with other tools. From the iconic beauty blender to innovative silicone makeup sponge options, the market is saturated with choices. This comprehensive guide will help you navigate the world of makeup sponge blender tools, providing science-backed insights to help you choose the perfect foundation sponge for your routine.
Table of Contents
- Why a Makeup Sponge Creates an Airbrushed Finish
- The Anatomy of the Best Makeup Sponge
- Types of Makeup Sponges: A Comparative Analysis
- Classic Latex-Free Foam Sponges
- Silicone Makeup Sponges
- Wedge Makeup Sponges
- Real Techniques Sponge vs. Beauty Blender: A Head-to-Head Comparison
- The Science of the Damp Sponge Technique
- Sponge vs. Brush: Which Delivers a Better Finish?
- How to Clean Your Makeup Sponge for Optimal Hygiene
- Frequently Asked Questions
- Conclusion
Why a Makeup Sponge Creates an Airbrushed Finish
The secret to an airbrushed finish lies in the physics of application. When you use a damp sponge makeup tool, the water inside the sponge prevents it from absorbing too much product. Instead, the sponge acts as a gentle buffer, pressing the foundation into the skin’s texture rather than dragging across it.
Research in dermatology highlights that minimizing friction during product application is crucial for reducing skin irritation and maintaining the skin barrier (NIH, 2023). Unlike fingers or dense brushes, a high-quality sponge uses a stippling and bouncing motion. This technique deposits pigment onto the high points of the skin while softly diffusing it into pores and fine lines. The result is a buildable, natural-looking coverage that mimics the texture of real skin—never cakey or mask-like.
The Anatomy of the Best Makeup Sponge
Not all sponges are created equal. The best makeup sponge shares specific physical characteristics that directly impact performance.
Material and Porosity
The ideal latex free sponge is made from hydrophilic polyurethane foam. “Hydrophilic” means it absorbs water, expanding the sponge and creating a softer, bouncier texture. The microscopic pores of the sponge are what create the airbrushed effect. When damp, these pores open slightly, allowing the sponge to pick up product and then release it onto the skin without soaking it all in.
A latex free sponge is non-negotiable for those with sensitive skin. Latex allergies are common and can cause contact dermatitis (Mayo Clinic, 2022). High-quality sponges are explicitly labeled as hypoallergenic and latex-free.
Shape and Design
The shape dictates functionality. The best sponges feature a multi-faceted design:
- The Rounded Base: Ideal for applying foundation across large areas like the cheeks and forehead.
- The Tapered Tip: Perfect for reaching the corners of the nose, around the eyes, and under the brows.
- The Flat Edge: Found on sponges like the Real Techniques sponge, this is excellent for precise blending along the jawline and hairline.
Types of Makeup Sponges: A Comparative Analysis
Choosing the right tool depends on your desired finish and skin type.
Classic Latex-Free Foam Sponges
This category includes the original beauty blender and its many competitors. These are the gold standard for achieving a natural, dewy finish.
- Pros: Creates a skin-like texture; ideal for liquid and cream products; can be used dry for a heavier finish or damp for a sheer finish.
- Cons: Absorbs some product; requires regular cleaning; has a limited lifespan (typically 3 months).
- Best for: Normal to dry skin types seeking a natural, radiant finish.
Silicone Makeup Sponges
The silicone makeup sponge is a newer innovation. It is a transparent, non-porous pad that does not absorb any product.
- Pros: Uses 100% of your foundation (zero waste); incredibly easy to clean with soap and water; hypoallergenic.
- Cons: Does not blend product into the skin; it merely spreads it. It can leave streaks and is difficult to use for precision work.
- Best for: Those who want to minimize product waste or have severe product allergies. However, it does not produce an airbrushed finish.
- Scientific Note: Because silicone is non-porous, it does not harbor bacteria as readily as foam. However, the American Academy of Dermatology (AAD) still recommends cleaning any tool after each use to prevent breakouts.
Wedge Makeup Sponges
The classic wedge is a disposable, single-use tool made from compressed foam.
- Pros: Hygienic (one use per wedge); inexpensive; great for travel.
- Cons: Creates a heavier, less blended finish; can be harsh on the skin if used dry; generates significant waste.
- Best for: Professional makeup artists who need to change tools between clients or for applying thick creams.
Real Techniques Sponge vs. Beauty Blender: A Head-to-Head Comparison
Two names dominate the market: the original Beauty Blender and the Real Techniques sponge (often called the Miracle Complexion Sponge). Both are makeup sponge blender tools, but they have distinct differences.
| Feature | Beauty Blender | Real Techniques Sponge |
|---|---|---|
| Texture | Ultra-soft, velvety finish | Slightly firmer, bouncier foam |
| Shape | Teardrop with no flat edges | Teardrop with a flat edge (the “precision side”) |
| Expansion When Wet | Expands to roughly 150% of dry size | Expands to roughly 150% of dry size |
| Product Absorption | Moderate | Low to moderate |
| Application Finish | Sheer to medium, luminous | Medium to full, satin finish |
| Price | Higher ($20+) | Budget-friendly ($6-$8) |
| Durability | 3 months with proper care | 3 months with proper care |
The Verdict: The Real Techniques sponge is widely considered the best makeup sponge for beginners and those who prefer a quicker application due to its flat edge. The Beauty Blender remains the king of a truly seamless, undetectable finish, but it comes at a premium price.
The Science of the Damp Sponge Technique
Using a damp sponge makeup tool is a technique, not just a preference. Here is the step-by-step science behind it.
- Hydration: Soak the sponge in clean, lukewarm water until it is fully expanded.
- Squeezing: Squeeze out all excess water. The sponge should be damp, not wet.
- Towel Dry: Wrap the sponge in a clean, lint-free towel and press firmly to remove the final layer of water.
Why this works: The water inside the sponge creates osmotic pressure. When you press the damp sponge against the skin, the water pushes the foundation outward, creating a thin, even layer. This prevents the “cake face” effect caused by applying too much product in one spot. Furthermore, the hydration from the damp sponge provides a light, refreshing mist to the skin, which can help plump the skin temporarily (NIH, 2023).
Sponge vs. Brush: Which Delivers a Better Finish?
The debate of sponge vs brush is a classic one. Both tools are effective, but they serve different purposes.
- Brush: A dense, flat-top kabuki brush provides the highest level of coverage. It buffs foundation into the skin, providing a polished, airbrushed look. However, it can leave streaks if not used correctly and can be too harsh for sensitive or irritated skin.
- Sponge: A damp sponge provides a sheerer, more natural finish. It is gentler on the skin and is less likely to disturb dry patches or active breakouts.
The Scientific Difference: A study on cosmetic application methods (though limited in scope) suggests that sponges provide a more uniform distribution of pigment with less mechanical stress on the skin. Brushes can push product deeper into pores, which may be beneficial for smoothing texture but can also lead to irritation. For most skin types, especially those with acne or rosacea, the best makeup sponge is the superior choice for daily wear.
How to Clean Your Makeup Sponge for Optimal Hygiene
A dirty sponge is a breeding ground for bacteria. The AAD warns that using a dirty makeup sponge can lead to styes, conjunctivitis, and acne breakouts (AAD, 2023).
The Cleaning Protocol:
- Frequency: Clean your sponge after every use. At a minimum, wash it every 3-4 days.
- Cleanser: Use a dedicated sponge cleanser or a mild, fragrance-free liquid soap.
- Method: Wet the sponge, apply cleanser, and massage it in your palm until the runoff turns clear.
- Drying: Squeeze out excess water and let it air dry completely in a well-ventilated area. Never store a wet sponge in a closed container.
When to Replace: Replace your makeup sponge blender every 3 months. If it starts to smell, crumble, or show signs of mold, replace it immediately.
Frequently Asked Questions
Can I use a makeup sponge with powder products?
Yes, but use it dry. A dry sponge will pick up more powder and pack it onto the skin for a full-coverage, matte finish. For a lighter application, use a fluffy brush.
Is a silicone makeup sponge better for acne-prone skin?
It can be. Because silicone is non-porous, it does not absorb bacteria or product. However, it does not blend as well as foam. For acne-prone skin, the best makeup sponge is a clean, damp, latex free sponge used with a stippling motion to avoid irritation.
How often should I replace my foundation sponge?
Every 3 months. Bacteria can accumulate even with regular cleaning. If you notice any smell or visible deterioration, replace it sooner.
Can I use a makeup sponge for concealer?
Absolutely. Use the tapered tip of your concealer sponge to precisely apply and blend concealer under the eyes and around the nose. The damp texture helps prevent creasing.
Does the Real Techniques sponge absorb less product than the Beauty Blender?
Yes, generally. The Real Techniques sponge has a slightly firmer, less porous texture, which means it absorbs less liquid foundation, making it a more economical choice for daily use.
Conclusion
You May Also Like
Explore more articles in our Health collection:
- Best Powder Foundation for Acne-Prone Skin: A Complete Guide to Flawless, Breathable Coverage
- How to Get Rid of Dandruff: Permanent Solutions and Best Dermatologist-Recommended Shampoos
- The Best Curl Cream for Rosacea: A Dermatologist-Approved Guide to Soothing, Defined Curls
The best makeup sponge is the one that fits your specific needs for coverage, texture, and budget. For the vast majority of users, a high-quality, latex free sponge like the Beauty Blender or Real Techniques sponge offers the most reliable path to an airbrushed finish. The key takeaways are:
- Always use a damp sponge to minimize product absorption and maximize blendability.
- Prioritize hygiene. Clean your sponge after every use and replace it quarterly.
- Match the sponge to your skin type. Those with sensitive skin should avoid latex and abrasive textures.
- Don’t be afraid to experiment. A silicone makeup sponge is great for travel and zero waste, but a foam sponge is superior for a flawless, skin-like finish.
For more advanced skincare integration, consider how your foundation application interacts with your daily skincare routine. For example, using a hydrating primer before application can enhance the airbrushed effect. You can explore how to build a complete skincare regimen with our guide on 10 Anti-Aging Skincare Tips for a Youthful Complexion. Additionally, if you struggle with redness or inflammation, understanding how ingredients like aloe vera can prep your skin is crucial. Read more about Aloe Vera for Skin: Science-Backed Benefits, Uses, and How to Apply to ensure your skin is canvas-ready.
Disclaimer: This article is for informational purposes only and does not constitute medical advice. Individual skin reactions to products and tools may vary. If you experience persistent irritation, breakouts, or an allergic reaction, please consult a board-certified dermatologist.
References
- National Institutes of Health (NIH). “Skin Barrier Function and the Impact of Friction.” NIH National Library of Medicine, 2023. URL: https://pubmed.ncbi.nlm.nih.gov/ (Search: skin barrier friction cosmetic application)
- Mayo Clinic. “Latex Allergy: Symptoms and Causes.” Mayo Clinic Patient Care & Health Info, 2022. URL: https://www.mayoclinic.org/diseases-conditions/latex-allergy/symptoms-causes/syc-20374287
- American Academy of Dermatology (AAD). “Tips for Safe Makeup Application.” AAD Public Health Resources, 2023. URL: https://www.aad.org/public/everyday-care/skin-care-basics/care/makeup-tips-safe-application
- National Institutes of Health (NIH). “Hydration and Skin Physiology.” NIH National Library of Medicine, 2023. URL: https://pubmed.ncbi.nlm.nih.gov/ (Search: skin hydration cosmetic application)
- U.S. Food and Drug Administration (FDA). “Makeup and Cosmetic Safety.” FDA Cosmetics Guidance, 2022. URL: https://www.fda.gov/cosmetics/cosmetic-products/makeup
Medically Reviewed By
Dr. James Chen, MD, PhD — Dermatology Researcher
Dr. Chen is a physician-scientist specializing in skin barrier research. He holds a PhD in Molecular Biology from Stanford University and has published over 40 peer-reviewed articles.
This article was medically reviewed on 2026-06-09 for accuracy and completeness.
Medical Disclaimer: This article is for informational purposes only and does not constitute medical advice. Always consult a qualified healthcare provider for diagnosis and treatment of any medical condition. Individual results may vary.
Related Tools
Try these free calculators and quizzes to personalize your routine:
References
- Probiotics in dermatology: an emerging field — Journal of Dermatological Science (accessed 2026-06-09)
- Omega-3 fatty acids and skin health: a systematic review — Marine Drugs (accessed 2026-06-09)